
Quick Answer
A doming machine sample test is a controlled pre-purchase trial used to check whether a defined combination of product, polyurethane or epoxy doming resin, metering pumps, dispensing heads, positioning method, and process settings can meet agreed requirements. It should use the actual production materials whenever possible and should produce a written record of the configuration, measurements, defects, cycle times, and manual interventions.
A good sample result does not by itself accept the machine that will be delivered. Use the sample test to establish feasibility, a factory acceptance test (FAT) to verify the ordered machine before shipment, and a site acceptance test (SAT) to confirm performance after installation under the customer’s real operating conditions.
Do not rely on generic limits for dome height, bubbles, positional error, or the number of sheets to test. Define each mandatory acceptance criterion, measurement method, sampling plan, and evidence requirement before the formal qualification run begins.
Key Takeaways
- Separate feasibility from equipment acceptance. A sample test, FAT, and SAT answer different questions and require separate records.
- Test a documented configuration. Record the resin, substrate, pumps, mixer, needle, head count, positioning method, program, and cure conditions.
- Set product-specific limits before testing. Use the drawing, approved visual master, end-use specification, or another agreed customer standard.
- Freeze the qualification setup. Complete tuning first, then run representative easy and difficult products without hidden changes or manual touch-up.
- Require decision-ready evidence. Return raw measurements, complete tray timing, accepted and rejected samples, photos or video, deviations, and open actions.
What a Doming Machine Sample Test Can—and Cannot—Prove
A pre-purchase sample test can show whether the tested process window is capable of producing acceptable domes on a defined product. It can help select metering-pump displacement, mixer and needle specifications, a single-head or multi-head arrangement, a fixture or vision-based positioning method, and initial curing conditions.
It can also expose risks that a catalog cannot show: resin overflow on narrow borders, trapped air, incomplete coverage, inconsistent flow between multiple needles, poor sheet registration, unreliable vision recognition, excessive operator handling, or an output target that cannot be reached at the required quality level.
However, one successful trial does not prove all future resin lots, substrates, layouts, operators, temperatures, or production shifts. It also does not prove outdoor life, adhesion, chemical resistance, or secondary-process durability unless the complete domed construction is tested under a customer-approved method. Review the doming resin selection center when the production resin or end-use requirement has not yet been finalized.
A sample test qualifies the documented test combination. It is not a universal performance guarantee and does not replace FAT or SAT.
Sample Test vs FAT vs SAT
| Stage | What is tested | Decision supported |
|---|---|---|
| Feasibility sample test | A representative machine and a documented candidate configuration using actual or approved representative products and materials | Whether the proposed process is feasible and which configuration should be quoted or developed further |
| Factory Acceptance Test (FAT) | The customer’s ordered machine, identified by serial number, with the agreed pumps, heads, mixer, needle, program, materials, and normal operating sequence | Whether the ordered equipment meets the contractual factory-acceptance requirements before shipment |
| Site Acceptance Test (SAT) | The installed machine in the customer’s environment with the intended utilities, operators, material handling, loading, curing, and inspection workflow | Whether the installed process meets the agreed site-acceptance requirements and is ready for production handover |
The purchase specification should state which criteria apply at each stage, who supplies the materials, who approves deviations, and what happens if a mandatory item does not pass. This prevents a visually attractive sample from being treated as evidence for requirements that were never tested.
Define the Test Scope Before Sending Materials
Start with the decision the test must support. A material-feasibility trial, a comparison between suppliers, a pump-sizing trial, a multi-head balance check, and a formal FAT require different test plans. Mark each requirement as mandatory or informational before materials are shipped.
For a supplier comparison, send the same product files, substrate construction, resin, quality limits, production assumptions, and reporting template to every supplier. If different machine configurations are tested, document those differences rather than presenting the results as a direct machine-speed comparison.
If final artwork is confidential, an anonymized or representative design can be used for early feasibility testing when it reproduces the smallest resin area, edge allowance, complex paths, layout pitch, surface appearance, and expected position variation. The final layout is still needed when the objective is to accept the final dispensing path or vision-recognition recipe.
Pre-Test Information Checklist
The supplier should confirm the following information before estimating material quantity, setup time, or the test sequence. There is no reliable universal instruction such as “send 10 sheets”; the required quantity depends on setup waste, cure schedule, inspection plan, repeated trials, and the number of configurations being compared.
| Area | Record before the test | Why it matters |
|---|---|---|
| Project control | Project name, product number, drawing revision, test location, date, report version, and responsible approvers | Prevents results from being applied to the wrong product or revision |
| Product and layout | Dimensions, resin area, edge allowance, quantity per sheet or fixture, minimum and maximum feature size, orientation, and worst-case shape | Defines shot control, path complexity, head spacing, and inspection locations |
| Substrate construction | Face material, ink, coating, laminate, adhesive construction where relevant, surface preparation, batch, and expected flatness | Surface condition can change wetting, edge retention, adhesion, and vision contrast |
| Resin system | Manufacturer, product name, batch, A:B ratio basis, technical data sheet revision, component condition, and candidate alternatives | A reference resin does not validate a different production resin |
| Material preparation | Component temperature, storage history, conditioning, cleaning, priming, degassing, and any validated heating or vacuum procedure | These conditions affect viscosity, reaction, moisture risk, and trapped air |
| Metering and dispensing | A-pump and B-pump displacement, mixer type, dynamic-mixer setting if used, needle specification, single or multiple heads, active head count, and needle spacing | The machine model alone does not define shot size or dispensing speed |
| Positioning | Manual reference, sheet registration, fixture, or vision method; permitted placement and rotation variation; program or path version | Separates product-position variation from dispensing repeatability |
| Curing and end use | Ambient conditions, cure and post-cure schedule, inspection time, handling time, secondary operations, and required environmental tests | Surface tack, full cure, adhesion, and end-use durability are different checks |
| Production target | Required accepted pieces per hour or shift, staffing assumption, tray-change method, cleaning plan, and allowed rework or scrap | Connects the sample result to a usable production requirement |
| Inspection plan | Requirement, test method, tool, sample map, inspection conditions, decision rule, and evidence format for every mandatory item | Removes subjective approval after the sample has already been made |
Build Product-Specific Acceptance Criteria
Do not copy a generic tolerance into the purchase specification. Dome profile, edge coverage, bubble allowance, placement, cure, and durability depend on the product drawing, approved appearance, resin, substrate, inspection capability, and end use.
Each formal acceptance record should answer three questions: What is required? How will it be measured? Which samples and locations will decide the result? A practical working table can use the following structure.
| Inspection item | Define before testing | Evidence to record |
|---|---|---|
| Mix-ratio and shot calibration | Approved calibration method, ratio basis, target shot mass or volume, tolerance, and calibration frequency | Raw A and B measurements, combined shot data, tool identification, date, and operator |
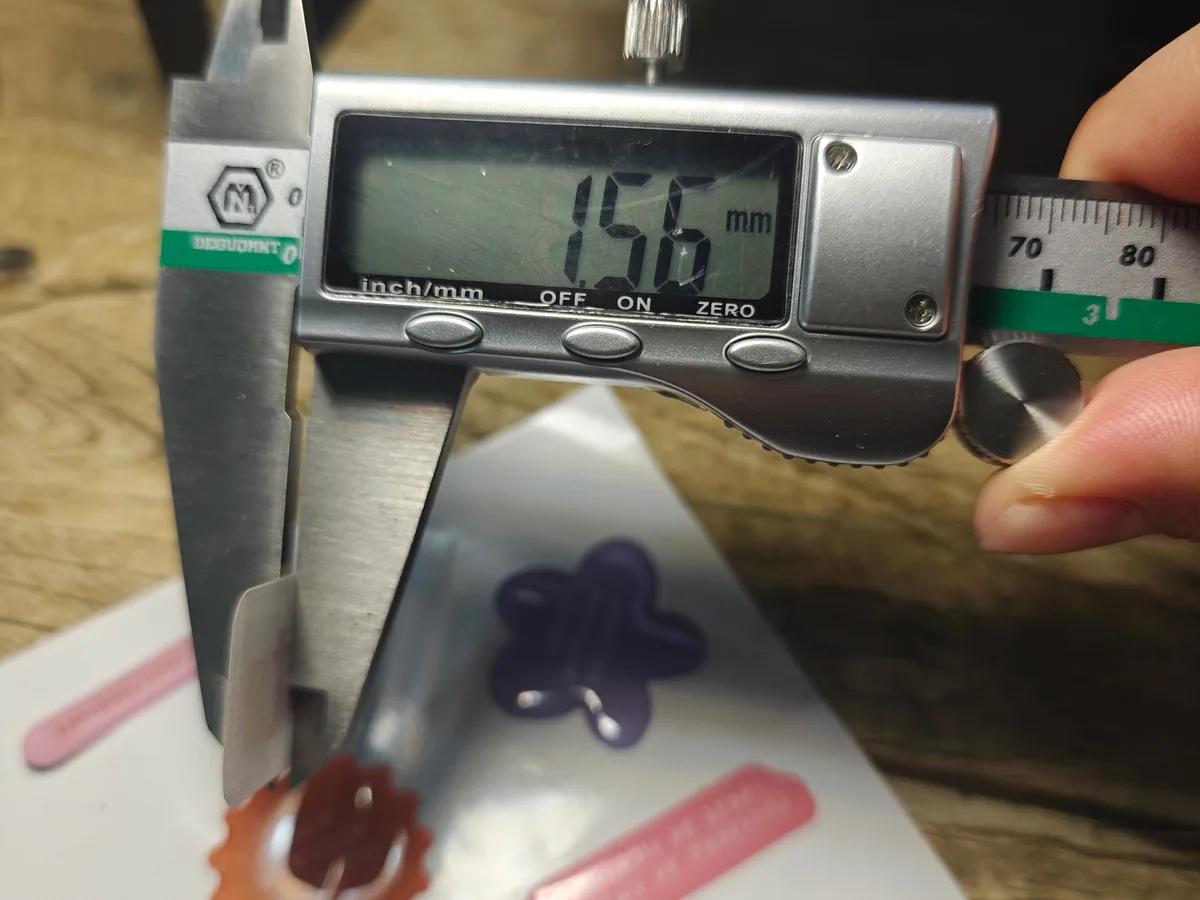
| Dome profile and coverage | Target volume or profile, measurement locations, edge allowance, overflow and underfill limits, cure stage, and approved visual master if used | Measurements or profile data, top and side images with scale, and location map |
| Resin placement | Datum or actual product boundary, permissible offset, inspection method, and measurement-system capability | Measured offsets at center, edges, corners, repeated trays, and known worst-case positions |
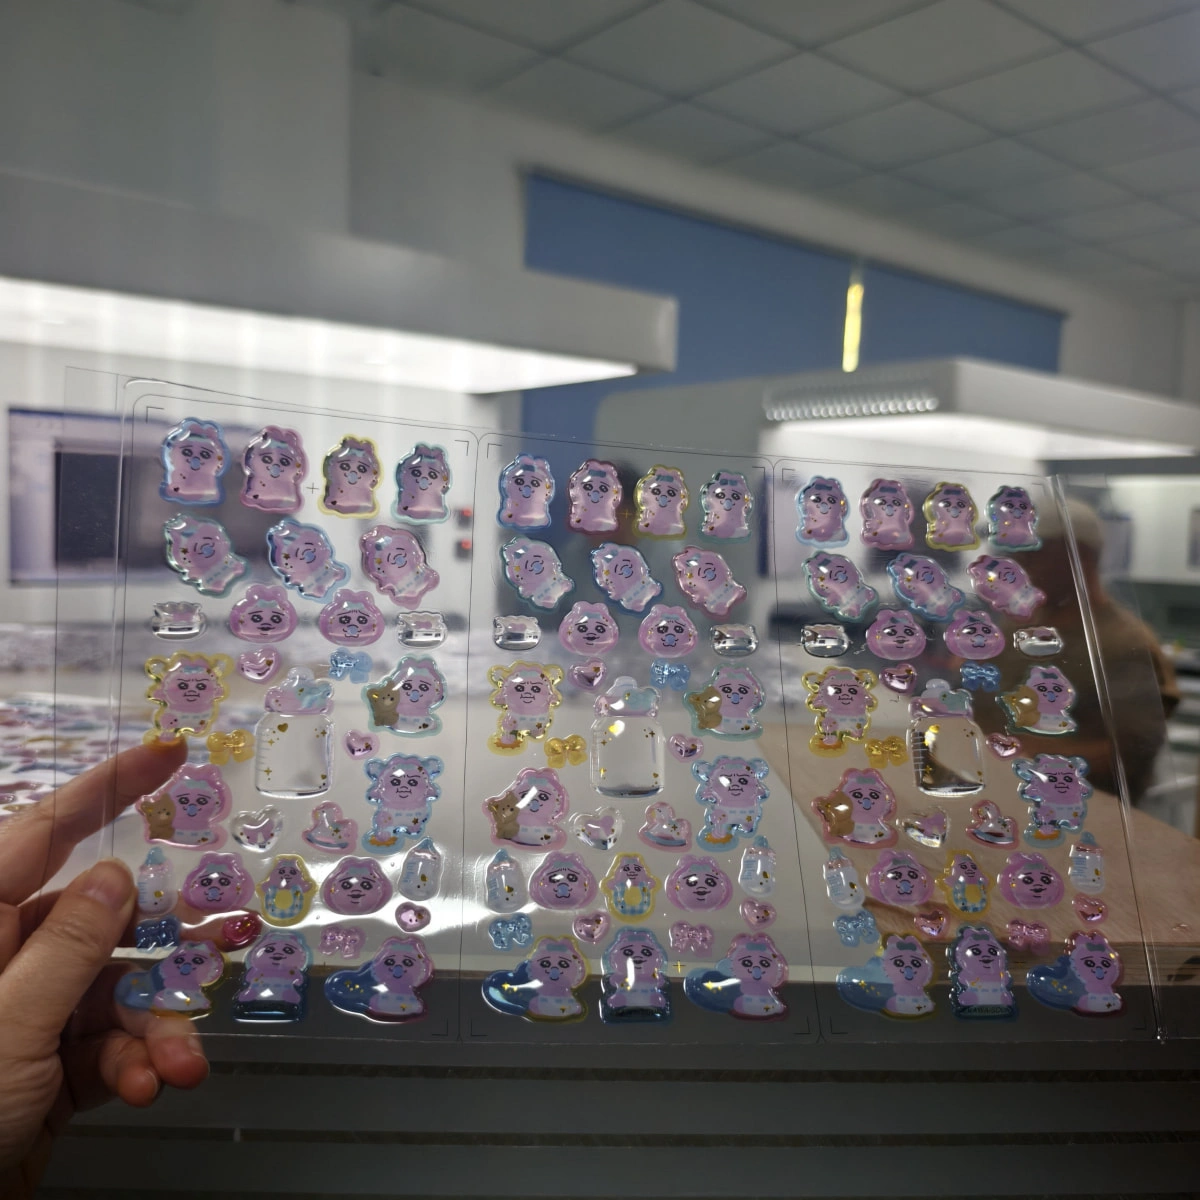
| Cosmetic defects | Lighting, background, viewing distance or magnification, defect zones, maximum bubble size, allowed count, cloudiness, yellowing, surface marks, tails, and drips | Accepted and rejected examples, defect photographs, bubble measurements, and counts by zone |
| Cure condition | Inspection time, tack-free requirement, full-cure requirement, hardness or other customer method, and any post-cure | Cure log, ambient conditions, test result, and deviations from the resin supplier’s process window |
| Adhesion and secondary processing | Final ink, coating, laminate and substrate construction; applicable peel, flex, die-cutting, forming, packaging, or handling method | Method, specimen conditioning, before-and-after observations, measurements, and failure mode |
| Environmental durability | Customer-specified exposure method, duration or cycles, specimen construction, and post-exposure evaluation | Traceable test report and before-and-after color, clarity, adhesion, cracking, or other required results |
| Sectioned specimens, if required | Cure state, cutting and preparation method, locations, magnification, and allowed internal or interface defects | Labelled section images and observations; note that a clean section does not by itself prove mix ratio, full cure, adhesion, or outdoor life |
| Repeatability and multi-head balance | Sampling map, number of repeated trays, outlet-to-outlet comparison, and decision rule | Measurements by sheet position, tray, and active outlet, including all rejected or adjusted pieces |
| Accepted production | Definitions of accepted, rework, and scrap; timing boundary; included operator tasks and interruptions | Total pieces, accepted pieces, rework, scrap, elapsed time, interventions, and reasons for loss |
Temperature affects resin viscosity and reaction speed. Moisture or humidity can be especially important for some polyurethane systems, but the risk and acceptable range are resin-specific. Record the actual conditions and apply heating, vacuum, or other material preparation only within the resin supplier’s validated process window. If defects appear, use the resin doming troubleshooting guide to separate material, mixing, surface, environment, positioning, and cure causes before changing the acceptance standard.
How to Run the Qualification Test
- Confirm incoming materials and the test plan. Check product revision, material identity and batch, quantity, condition, and pre-agreed inspection requirements before setup begins.
- Run a separate setup and tuning phase. Allow the technician to prime the system, establish the ratio, adjust the target shot, optimize paths, and correct the fixture or recognition recipe. Label setup pieces and exclude them from formal acceptance.
- Freeze the candidate configuration. Record pump sizes, head count, needle spacing, mixer, needle, program version, resin settings, material conditions, and cure schedule before the qualification run.
- Run the normal production sequence. Use the intended loading and positioning method with a trained operator. Do not allow unrecorded recipe changes, hidden product repositioning, manual resin touch-up, or discarded failures.
- Include the agreed worst case. Test the smallest resin area, largest target volume, most complex path, least favorable sheet position, maximum permitted placement variation, or other risk that determines the application limit.
- Check repeatability. Sample the center, edges, and corners of the working area, repeat the job across the agreed number of trays or fixtures, and compare active outlets when multi-head dispensing is used.
- Cure and inspect exactly as specified. Keep tack-free checks separate from full-cure and application-durability tests. Record inspection timing and all environmental conditions.
- Close every deviation. Identify whether a failure is caused by material, setup, fixture, recognition, machine function, environment, or an unrealistic requirement. Record the correction and repeat the same agreed protocol when a retest is required.
The correct number of sheets, trays, or parts is risk-based. Agree it before the run based on the number of layouts, repeated positions, active dispensing heads, expected variability, destructive tests, and confidence required for the purchase decision.
Machine-Specific Checks for PJ180, DJ771, and SJ4060
The three platforms can be evaluated with a single head or a compatible multi-head configuration. Automation level changes how the product is positioned and how much operator work is required; it does not create a fixed dispensing-speed range. Choose the test configuration from the smallest product, resin volume, repeat layout, required precision, and intended operator workflow.
| Machine platform | Critical sample-test checks | Evidence to capture |
|---|---|---|
| PJ180 semi-auto machine | Normal manual tray positioning or indexing, intended single or multi-head configuration, operator reach and rhythm, setup repeatability, and the smallest controllable product | Manual movements per tray, complete operator cycle, interventions, active heads, accepted output, and training assumptions |
| DJ771 3-axis machine | Repeatable sheet or fixture placement, program alignment, path execution, tray loading, and changeover under normal production references | Fixture or datum method, placement variation, loading time, program version, full tray cycle, and repeatability across trays |
| SJ4060 CCD vision machine | Recognition on the real print, gloss, transparency, contrast, orientation and allowed placement range; path correction; failure handling; and dual-station workflow if used | Recognition time, permitted translation and rotation, recognition failures, correction results, station-change interval, interventions, and accepted output |
PJ180 can be productive on simple, regularly arranged sheets when operator involvement is acceptable. DJ771 can offer strong value for badges, nameplates, automotive emblems, keychains, and other rigid parts when a well-designed fixture preserves repeatable coordinates. The 3-axis automatic resin doming machine buying guide explains how fixed coordinates, fixtures, and repeat layouts affect that decision.
SJ4060 becomes valuable when real position or angle variation exceeds the allowed dispensing error and cannot be controlled economically with sheet registration or a fixture. Irregular geometry alone does not make CCD essential, and CCD does not guarantee higher output on a simple regular sheet. Use the CCD vision doming machine guide to determine which recognition conditions must be included in the trial, then use the sticker doming machine selection guide to compare the three positioning workflows.
Do not use product width alone as a head-count rule. Treat very small or narrow resin areas as a feasibility question. Test the actual resin area, target volume, needle spacing, pump displacement, placement tolerance and accepted reject limit. If a shared multi-head path cannot meet the criterion, use a single head, smaller pumps or another validated configuration.
Validate Usable Production Output
An acceptance report must state what the recorded time includes. Keep recognition or alignment, active dispensing, non-dispensing motion, operator loading, tray exchange, cleaning, interruptions, rework, and rejects visible rather than presenting one ideal cycle as shift output.
For model comparisons, hold the resin, target volume, pump displacement, mixer and needle, active head count, path, cure, and quality standard equivalent wherever possible. If one machine uses a different configuration, identify the result as a configuration comparison rather than a universal model ranking.
This checklist defines the evidence and acceptance boundary. Use How to Estimate Resin Doming Production Output for the complete tray-cycle and accepted-pieces calculation.
Evidence the Supplier Should Return
- Test identity: project and product revision, test date and location, supplier, machine model, tested machine identifier or serial number, software and program version, and operator.
- Material traceability: substrate construction and batch, resin brand and product, resin batch, ratio basis, technical data sheet revision, material preparation, and ambient conditions.
- Frozen configuration: A and B pump displacement, mixer, needle, active head count, needle spacing, target volume, fixture or recognition method, path version, and cure schedule.
- Raw inspection data: measurements by sample location, outlet, and tray; calibration records; accepted, rework, and scrap counts; and all deviations.
- Visual evidence: labelled top, side, defect, and optional section images with scale; unedited video showing the timing boundary, normal loading, and any interventions.
- Physical samples: clearly labelled setup, qualification, worst-case, accepted, and rejected samples when shipment and cure conditions allow.
- Output record: products per tray, recognition, dispensing-only and complete-cycle times, operator tasks, repeated trays, interruptions, and usable output.
- Decision and actions: status for each mandatory criterion, approved deviations, corrective actions, owner, due date, and required retest or FAT/SAT carry-over item.
The report should state whether the test used the customer’s ordered machine or a representative demonstration machine. If the machine or configuration changes after testing, identify which results remain applicable and which items must be repeated.
Pass, Conditional Pass, Retest, or Not Accepted
| Status | When to use it | Required follow-up |
|---|---|---|
| Pass | All mandatory criteria pass under the frozen configuration, with no unrecorded recipe changes or manual touch-up | Approve the defined stage and carry the configuration and evidence into the quotation, purchase specification, FAT, or SAT as applicable |
| Conditional Pass | Mandatory quality and output requirements pass, but a noncritical document, training item, spare, or other delivery action remains open | Record the exact condition, owner, due date, verification method, and consequence if it is not closed |
| Retest | A correctable material, parameter, fixture, recognition, environment, or procedure issue prevents a valid decision | Correct the cause, document the change, and rerun the same agreed qualification protocol |
| Not Accepted | A mandatory requirement is missed under the agreed configuration, or sustained unagreed manual intervention or material substitution is required | Reject the tested stage or revise the requirement and commercial scope through an approved change before any new test |
Common Evaluation Mistakes
- Using the supplier’s easiest reference resin. A good result with an unidentified “golden sample” material does not qualify the intended production resin.
- Mixing setup and qualification samples. Tuning is necessary, but adjusted and discarded pieces must not disappear from the record.
- Approving by top-view photography alone. Photographs can hide edge profile, placement, surface defects, cure condition, and internal or interface issues.
- Inventing universal tolerances. Generic dome height, positional accuracy, bubble count, or tray quantity can be inappropriate for the actual product and inspection method.
- Comparing unequal configurations. Different pump sizes, resin volumes, head counts, paths, quality limits, or operator tasks invalidate a simple speed ranking.
- Assuming complex geometry requires CCD. Vision is justified by uncontrolled position variation, not by shape alone; a suitable fixture may make fixed-coordinate dispensing more economical.
- Extrapolating the fastest cycle to a full shift. Loading, cleaning, refilling, cure capacity, inspection, rework, and scrap can determine the actual accepted output.
- Treating a sample pass as final machine acceptance. The ordered machine and installed production process still require the agreed FAT and SAT.
FAQ
Is a perfect sample enough to approve the machine?
No. It proves only that the documented test combination produced an acceptable sample under the recorded conditions. The ordered machine should still pass FAT, and the installed process should pass SAT, according to the purchase agreement.
Must the test use the exact production resin?
Use the intended production resin whenever it has been selected. If it has not, test each named candidate that could affect pump sizing or process capability and record the exact product and batch. A result with a supplier’s reference resin is useful for early screening but does not validate a different production resin. Resin family and end use should be decided before the final equipment configuration is accepted.
How many sheets or trays should a qualification run include?
There is no universal number. Agree the quantity before testing based on product risk, the sampling map, active dispensing heads, repeated tray positions, material variability, destructive tests, and the level of evidence required. The run must be long enough to expose the repeatability and handling risks being accepted.
Can representative geometry replace confidential final artwork?
It can support early feasibility work if it reproduces the critical sizes, borders, paths, spacing, surfaces, and position variation. Use an NDA where appropriate. The final artwork and layout are still required to accept the final path, coverage, fixture, or vision-recognition recipe.
Should cycle time be an acceptance criterion?
Yes, when output matters, but define exactly what the timer includes. Record recognition, dispensing-only time, full machine cycle, operator and tray handling, interruptions, and accepted pieces separately. A fast cycle that creates more rework does not meet a usable-output requirement.
How can PJ180, DJ771, and SJ4060 be compared fairly?
Use the same product, resin, target volume, pump displacement, mixer and needle, active head count, path and quality criteria wherever possible. Then record the different positioning and operator tasks. On a simple regular sheet with matched multi-head configurations, pure dispensing performance may be closer than the automation levels suggest; the larger differences are often labor, positioning effort, recognition, and reject risk. See the semi-auto vs automatic doming machine comparison for those workflow differences.
Does CCD vision guarantee higher output or better dome quality?
No. CCD vision can reduce positioning work and errors when actual placement varies, but it does not replace correct resin conditioning, metering, mixing, pump selection, path design, or curing. It is not automatically faster on a simple sheet whose position is already controlled.
Is a cross-section required for every sample test?
No. Use destructive sectioning when internal voids or interface defects are important and define the specimen preparation and acceptance method in advance. A clean section is supporting evidence only; it does not by itself prove mix ratio, full cure, adhesion, or long-term durability.
What if the sample test passes but FAT or SAT fails?
Record the exact difference in machine configuration, material, environment, program, operator workflow, or measured result. Correct the cause and repeat the applicable agreed test before acceptance. The sample result should not override a failed mandatory FAT or SAT criterion; the purchase contract and approved change process should govern the commercial response.
Conclusion
A useful doming machine sample test is not a showroom demonstration. It is a documented feasibility study with controlled inputs, frozen qualification settings, product-specific acceptance criteria, repeatability evidence, and an honest record of output and defects.
Use the sample result to choose the process configuration, then carry the same critical settings and evidence into FAT and SAT. Before requesting quotations, combine this checklist with the machine-selection and production-output methods above so that quality, positioning, labor, and accepted output are evaluated as one purchasing decision.