
Quick Answer
Resin doming cure time, temperature, and humidity limits are formulation-specific; there is no universal setting. The correct process window comes from the technical data sheet (TDS) for the exact A and B components, followed by tests on the final substrate, ink, coating, dome geometry, and production method. A value published for one epoxy or polyurethane product should not be applied to every resin in the same family.
Control four conditions separately: material storage, A/B component temperature during metering, the temperature and moisture condition of the product, and the environment around the loaded curing tray. Heating, vacuum degassing, dry storage, and room humidity control solve different problems. None of them can correct the wrong mix ratio, incomplete mixing, contamination, an unsuitable resin, or an unqualified cure schedule.
For purchasing and production planning, define what “cured” means at each decision point. Surface dry, tack-free, safe tray handling, packing readiness, final cure, and end-use durability are not interchangeable. Record the test method and acceptance time for every required stage.
The practical rule: use the exact resin TDS to set a candidate window, then qualify that window with measured material, room, substrate, and cure-zone conditions. Do not buy a heater or degassing option from a generic temperature or humidity threshold.
Key Takeaways
- Use the exact resin product, not only the family name. Epoxy and polyurethane formulations can have different ratios, viscosities, working times, moisture sensitivities, and cure schedules.
- Measure conditions where the process happens. Record material, substrate, dispensing-area, and cure-zone conditions at the time the batch is processed.
- Temperature changes both flow and reaction. It can affect viscosity, delivered volume, edge hold, bubble release, working time, and cure rate.
- Moisture control, degassing, and heating are separate controls. None replaces sealed storage, correct mixing, a leak-free fluid path, or product-specific limits.
- Define the required cure stage and capacity. Tack-free, tray handling, packing readiness, final cure, and end-use performance support different production decisions.
Why Temperature, Humidity, and Cure Time Matter
Resin doming places a controlled volume of mixed resin onto a printed product and relies on flow, surface tension, edge design, and curing to form a clear raised dome. The same principles apply to domed decals, badges, nameplates, keychains, and other printed or coated products, but the acceptable process window can change with the construction and end use.
Environmental conditions affect several connected stages. A colder component may meter and mix differently because its viscosity has increased. A warm mixed resin may flow more easily but provide less working time. A damp substrate or moisture-sensitive component can introduce defects. A loaded cure rack may also experience different conditions from the wall-mounted room sensor.
| Condition | Why it matters | Evidence to record |
|---|---|---|
| A and B component temperature | Changes in viscosity, pump load, flow, mixing behavior, and reaction rate can alter shot delivery, leveling, and the usable working window. | Temperature of each component near the metering point, product code, lot, time, and method |
| Substrate and tray condition | Wetting, condensation risk, edge flow, adhesion, and initial heat transfer can affect interface clarity, overflow, leveling, and cure. | Product temperature, storage history, flatness, surface preparation, and moisture-control step |
| Ambient temperature and relative humidity | Open handling, heat loss, moisture exposure, and cure behavior can create seasonal changes in bubbles, haze, surface condition, working time, and cure time. | Sensor location, reading at batch start and finish, peak conditions, and response taken |
| Cure-zone conditions | Reaction rate, temperature uniformity, dust exposure, and tray stability can create different cure states, delayed packing, tack, distortion, or excess work-in-progress. | Loaded-zone temperature, humidity when relevant, timer boundary, tray position, and cure-test result |
Start With the Exact Resin Product, Not the Family Name
“Epoxy” and “polyurethane” identify broad chemistry families, not fixed production recipes. One epoxy can be soft, another hard; one polyurethane can have a short working window, another a longer one. Outdoor performance, flexibility, yellowing resistance, and moisture sensitivity must be confirmed for the exact formulation and completed printed product.
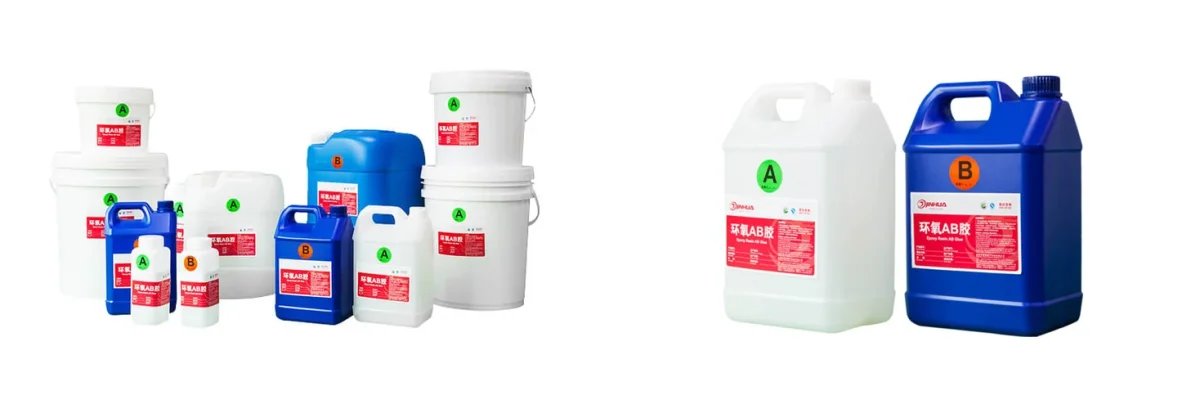
Use the doming resin options page to identify candidate products, then compare the relevant formulation and end-use requirements in the epoxy vs polyurethane doming resin guide. The following table shows why product identification matters.
| Published reference | Published product-specific data | How to use the data |
|---|---|---|
| 618AB-18 polyurethane | The current TDS lists A:B = 1:1 by weight and a 15-minute pot life at 25°C; it notes that a mixed mass above 100 g can shorten that value. The main table lists 25°C for 24 hours or 65°C for 3.5 hours. The manual workflow lists 60–80°C for 2–3.5 hours, while the machine workflow lists 60°C for 2–4 hours. Its typical data are referenced at 25°C and 65% RH. | Use only as a starting reference for 618AB-18. Confirm the exact manual or machine process, batch size, heat-cure schedule, moisture control, substrate suitability, and acceptance stage from the current 618AB-18 TDS and a production sample test. |
| 308AB-3S1 soft epoxy | The current TDS lists A:B = 3:1 by weight, 2.7:1 by volume, and a 50 ± 5 minute pot life for a 100 g mass at 25°C. It lists initial cure at approximately 10–12 hours and final cure at approximately 18 hours at room temperature. Its typical data are referenced at 25°C and 70% RH, and it includes formulation-specific low-temperature and high-humidity precautions. | Use only as a starting reference for 308AB-3S1. Confirm the metering-ratio basis, real dome volume, resin and substrate temperatures, humidity condition, cure stage, and final construction from the current 308AB-3S1 TDS and a production sample test. |
The ratio basis matters on a meter-mix machine. Gear pumps meter displacement, so a 3:1 ratio by weight must not be entered automatically as 3:1 by volume. Use the product densities or the supplier’s approved volume ratio to configure the A and B pump relationship, then verify the separate deliveries by an agreed calibration method.
Document clarification required: the 618AB-18 TDS also contains a separate “curing time (50 g sample) 1–2 h” entry without a stated temperature, cure stage, or acceptance endpoint. Do not use that entry to set handling, packing, or final-cure time until the supplier explains it in writing. The 308AB-3S1 TDS also lists an undefined “operating temperature range” of 10–70°C; do not treat it as a storage, dispensing, heated-cure, or finished-product service range without written clarification.
Pot-life data also depends on the test mass, container, and temperature. A value measured on a 100 g mass in a cup is not automatically the dispensing time available after the same mixed resin has entered a thin fluid path or spread into small domes. Record the supplier’s test basis and define the usable machine working window separately.
In an automatic meter-mix system, A and B normally remain separate through the storage and metering circuits and meet at the mixer. The mixed-side residence time, pause limit, and restart procedure therefore require their own validation; the unmixed time in the A and B tanks is not pot life.
Measure Conditions at the Process, Not Only at the Wall
A useful production record separates storage, conditioning, dispensing, and curing. It also identifies the measuring device, sensor location, and time. A temperature displayed on a machine does not prove the temperature of every tank, hose, mixer, substrate, or loaded cure tray.
- Material storage: record the sealed storage range, time out of storage, container condition, shelf life, lot, and any settling or conditioning requirement in the TDS.
- Before metering: measure the A and B component temperatures independently. Do not assume both components have reached room temperature because their containers share the same room.
- Before opening cold material: keep the container sealed while it reaches the supplier-supported process window when condensation is a risk, and record the equilibration time.
- At dispensing: record ambient temperature and relative humidity close to the work area, plus the substrate temperature when it can differ from the room.
- During curing: measure the loaded zone rather than an empty chamber or a distant wall. Map different rack or oven positions when uniformity affects the result.
- At inspection: record elapsed time from a defined start point, product temperature, cure stage, test method, and the actual result.
For seasonal production, capture the lowest and highest conditions that are expected in normal operation. A process qualified only on a mild day may not represent winter startup, a humid wet season, a newly opened material container, or a fully loaded curing area.
Understand What Heating Can and Cannot Change
Heating is not one feature. The required hardware and control method depend on whether the goal is to condition a component, prepare a substrate, or cure the mixed resin.
| Heating task | Purpose and validation | Common wrong assumption |
|---|---|---|
| A/B material conditioning | Keep component viscosity and pump behavior within the supplier-supported window. Validate which component may be heated, sensor position, uniformity, maximum exposure time, pump calibration, working window, and safety controls. | “A warmer resin will always dispense better.” |
| Substrate preheating or drying | Prepare a product when the exact resin procedure requires moisture removal or a defined application temperature. Validate substrate compatibility, real product temperature, cooling time, flatness, print or adhesive effects, and contamination control. | “Any label can be put in an oven at the same temperature.” |
| Heated curing | Accelerate an approved reaction schedule and reduce residence time. Validate loaded-zone temperature, ramp and dwell, tray and product compatibility, ventilation, timer boundary, cure state, appearance, adhesion, and final performance. | “The machine heater and the cure oven are the same control.” |
Higher temperature often lowers liquid viscosity and accelerates reaction, but the production effect is not automatically positive. The resin may spread farther, lose edge hold, shorten its usable working time, or respond differently at startup and after a pause. Recalibrate delivered volume and recheck dome profile whenever the validated material condition changes.
Heating boundary: do not change the A/B ratio to adjust cure speed, and do not apply a cure temperature taken from another resin. Heating cannot repair inaccurate metering, incomplete mixing, a contaminated component, moisture exposure, poor substrate compatibility, or an expired material.
Humidity, Moisture, and Degassing Are Different Controls
Many two-component polyurethane systems use an isocyanate component that requires protection from water and humid air. Moisture can consume reactive material and contribute to carbon-dioxide formation or other defects. The required controls still come from the exact formulation: “polyurethane” alone does not define one safe humidity limit or one vacuum procedure.
Epoxy should not be described as unaffected by humidity. The current 308AB-3S1 TDS, for example, includes a high-humidity precaution for that specific formulation. Other epoxy products can have different limits and surface behavior. The correct purchasing question is therefore “What does this product’s current TDS require?” rather than “Is epoxy always easier?”
Vacuum degassing is useful when a documented procedure shows that entrained or dissolved gas is contributing to bubbles. It does not replace sealed storage or dry handling, and it does not guarantee removal of water that has already contaminated or reacted with a component. The supplier should identify which component or mixed material may be degassed, the allowable vacuum and time, agitation or settling requirements, hold time, and exposure controls.
- Protect the material: keep specified containers sealed, limit open exposure, prevent water entry, and follow the product’s storage and transfer procedure.
- Protect the fluid path: check fittings, pump inlets, hoses, mixer, valves, and the dispensing head for air entry or incomplete priming.
- Control the product: store substrates and trays to prevent condensation or surface moisture and use only a validated drying method.
- Control mixing: verify A/B ratio, mixing quality, residence time, batch size, and the exact point where bubbles first appear.
- Validate degassing: compare samples before and after the documented vacuum step under otherwise equivalent conditions.
If bubbles, haze, or tack remains after the environment is checked, use the resin doming troubleshooting guide to separate moisture, trapped air, mixing, ratio, viscosity, surface, and cure causes before changing equipment.
Use the TDS and SDS for Different Decisions
A technical data sheet describes product properties and recommended processing, while a safety data sheet supports hazard, exposure, storage, spill, first-aid, and disposal decisions. Request the current SDS for each A component, B component, and cleaning material; a general resin product manual is not a substitute.
Uncured resin systems require formulation-specific controls. The US National Institute for Occupational Safety and Health overview of isocyanates identifies respiratory and skin concerns relevant to isocyanate-containing polyurethane materials. Its guidance on epoxies and resins also recommends following product labels and SDS information, selecting suitable ventilation and protective equipment, and not using odor as a safety indicator.
Safety boundary: heating, vacuum, opening containers, priming, cleaning, and mixed-resin maintenance can change exposure conditions. Define ventilation, enclosure, gloves, eye or face protection, protective clothing, spill response, and waste handling from the current SDS, the actual task, an occupational-hygiene assessment, and local requirements.
Define Cure Time by Measurable Stages
A single statement such as “cures in 12 hours” is incomplete unless the stage and method are defined. Technical data sheets do not always use the same terminology, so translate each supplier term into a production decision and acceptance test.
| Stage | Meaning and production decision | Evidence to define |
|---|---|---|
| Pot life | A supplier-defined test period for a specified mixed mass, container, and temperature. It informs batch size and purge or pause planning only when the reference is relevant to the real fluid path. | Test mass, temperature, end criterion, and source document |
| Usable working window | The period in which the real process still meters, mixes, dispenses, levels, and meets quality requirements. It defines the maximum run, stop-and-restart method, and mixed-side cleaning interval. | Start point, delivery and appearance checks, machine configuration, and failure criterion |
| Gel or tack-free stage | The resin has progressed beyond free flow or no longer feels tacky under a defined method. This can decide whether a tray may move to the next controlled step. | Touch or instrument method, load, contact material, time, temperature, and result |
| Handling or packing cure | The complete product can tolerate the agreed transfer, separation, stacking, packing, or secondary operation. This decides when work-in-progress may leave the cure area. | Actual handling simulation, deformation, marking, adhesion, and reject criteria |
| Final cure or post-cure | The defined material or product properties have reached the required state. This decides when final inspection, durability testing, shipment, or end-use loading is allowed. | Supplier-defined schedule plus hardness, adhesion, flexibility, appearance, or other product-specific tests |
Build a Validated Resin Doming Process Window
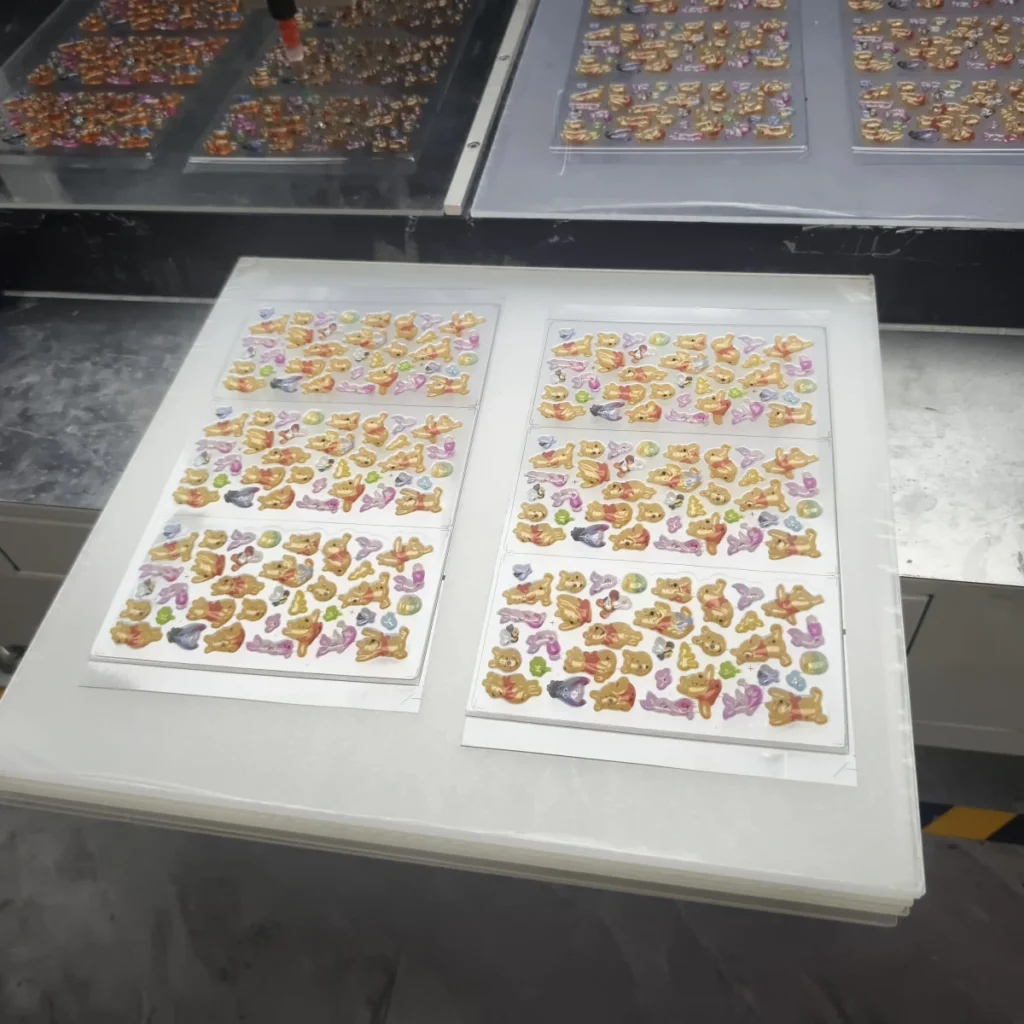
A useful process window is not one ideal setpoint. It is a tested range with defined responses when a measurement approaches or crosses a limit. Build it with the final resin, substrate, printing, dome volume, metering configuration, and cure method.
- Freeze the test construction. Record the resin manufacturer and product codes, lots, A/B ratio basis, substrate, ink, coating or laminate, edge design, dome target, pump sizes, mixer, needle, and head count.
- Define every temperature and humidity measurement. Identify the device, calibration status, sensor location, sample time, and which material or zone the reading represents.
- Calibrate metering before the qualification run. Verify the separate A and B delivery and combined shot using an agreed method. Do not infer ratio from a visually acceptable dome.
- Test the normal and expected boundary conditions. Stay within the resin supplier’s supported limits while representing seasonal startup, sustained running, pauses, and the loaded cure area.
- Measure process behavior. Record shot delivery, flow, edge coverage, bubble formation, working time, manual intervention, and the actual cure-stage results.
- Repeat after settings are frozen. Run enough trays, positions, outlets, lots, and operating periods to expose variation rather than accepting one attractive sample.
- Set response rules. Define when to stop, condition material, quarantine output, extend cure, inspect more samples, clean or reprime the fluid path, or contact the resin supplier.
The doming machine sample test and acceptance checklist provides a fuller framework for separating early feasibility, factory acceptance, and site acceptance. Environment and cure evidence should remain traceable to the exact samples being approved.
Choose Environmental Controls From the Failure Mode
Optional equipment should close a documented process gap. A heater, vacuum unit, enclosure, dehumidifier, oven, or data logger should have a named controlled variable, measurable acceptance condition, and maintenance method.
| Observed need | First controls to evaluate | Do not assume |
|---|---|---|
| Cold-start viscosity or seasonal shot change | Verify material temperature, storage history, pump calibration, and supplier-approved conditioning before specifying tank or hose heating | Every component may be heated to the same setpoint |
| Moisture-sensitive material or humid open handling | Seal containers, shorten exposure, control transfer, measure local RH, protect the substrate, and add a product-supported dry-air or room-control method where required | Vacuum degassing alone controls workshop humidity |
| Entrained air after mixing or startup | Check mixing, component condition, leaks, priming, hose routing, mixer pressure, and a validated component or mixed-material degassing procedure | All visible bubbles are caused by humidity |
| Cure residence time exceeds available rack capacity | Validate an approved heated cure, add protected level residence space, change scheduling, or test another suitable resin formulation | Changing the mix ratio is an acceptable cure-speed adjustment |
| Different cure results by rack or oven position | Map the loaded zone, airflow, tray spacing, temperature recovery, door-opening effect, and sampling positions | The controller display proves uniform product temperature |
Machine Positioning Does Not Replace Resin Control
Environmental requirements belong to the resin process, not to one positioning platform. A PJ180 semi-auto resin doming machine can support samples or operator-positioned production. A DJ771 3-axis automatic resin doming machine repeats saved paths on accurately located products. An SJ4060 CCD vision doming machine reduces exact placement work when product positions vary.
Those differences affect loading, positioning, path execution, and operator work. They do not make a resin immune to temperature, moisture, air, mixing, or cure variation. CCD vision can correct a recognized product position; it cannot correct the A/B ratio, remove bubbles, choose a cure schedule, or confirm full cure.
For outdoor domed nameplates or other demanding applications, choose the candidate resin from the actual exposure, flexibility, adhesion, and appearance requirements. Choose the positioning platform separately from the repeatability of the product layout. Then qualify the combined process.
Plan Curing Capacity and Accepted Output Together
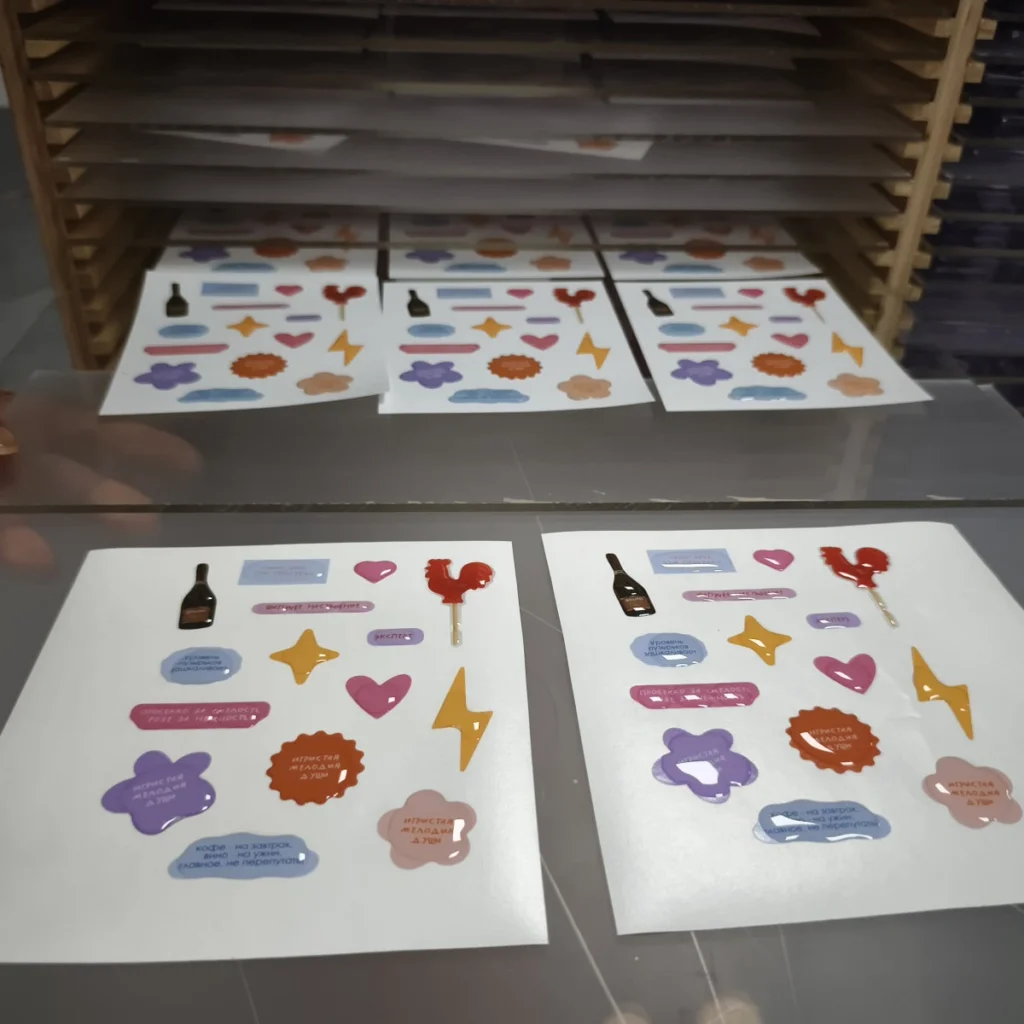
Cure time creates work-in-progress, so the validated residence time must be matched with enough level tray positions, transfer space, inspection capacity, and quarantine allowance. Record the actual number of trays entering the curing area and the cure stage required before each tray may be handled or packed.
This guide defines the environmental and cure boundary. Use How to Estimate Resin Doming Production Output for the complete tray-cycle, accepted-yield, handling, and shift-capacity calculation. Do not convert the shortest dispensing cycle directly into sellable pieces per day.
Diagnose From Records, Not From One Symptom
The same visible defect can have several causes. Change one controlled factor at a time and retain the original samples, condition log, resin lot, machine recipe, and inspection result.
| Symptom | Conditions to investigate | Evidence before changing equipment |
|---|---|---|
| High viscosity, slow delivery, or underfill | Component temperature, storage history, crystallization or condition allowed by the TDS, pump calibration, restriction, mixer, and needle | A/B temperatures, separate delivery checks, pressure or motor behavior where available, and repeated shot measurements |
| Overflow or weak edge hold | Resin temperature, target volume, viscosity, substrate temperature, product flatness, edge design, and dispensing path | Measured volume or mass, top and side images, product temperature, tray level, and path version |
| Bubbles | Material moisture or entrained air, mixing, leaks, incomplete priming, flow restriction, substrate geometry, chemical reaction, and dispensing method | Location and timing of bubble appearance, sealed-storage history, RH, component condition, degassing record, and fluid-path checks |
| Tacky, soft, or uneven cure | A/B ratio, mixing, contamination, material age, cure temperature and uniformity, insufficient residence time, or an unsuitable test method | Separate ratio calibration, lot and expiry, cure-zone map, elapsed-time boundary, and results by tray position |
| Haze, cloudiness, or poor interface | Moisture, condensation, substrate or coating compatibility, contamination, mixing, cure environment, and formulation suitability | Surface preparation, substrate temperature, dew or moisture risk, retained control sample, and cross-lot comparison |
Supplier and Sample-Test Checklist
Send enough information for the supplier to recommend and test a complete process rather than a generic machine option.
- Product construction: dimensions, resin area, target dome profile, edge allowance, substrate, ink, coating or laminate, flatness, and layout.
- End use: indoor or outdoor exposure, UV, moisture, cleaning, contact, bending, impact, service temperature, and required life or test method.
- Resin identity: exact manufacturer, A and B product codes, ratio basis, current TDS and SDS revision, lots, storage history, and expiry.
- Site conditions: seasonal minimum and maximum temperature, relative humidity at the work area, substrate storage, and any existing dry room, oven, or HVAC limitations.
- Production method: manual, PJ180, DJ771, SJ4060, or another platform; A and B pump sizes; mixer; needle; single or multiple heads; tray and cure transfer method.
- Required cure stages: maximum time to move, inspect, separate, pack, ship, and perform final durability testing.
- Quality limits: dome volume or profile, edge coverage, bubbles, haze, tack, hardness, adhesion, flexibility, yellowing, and allowable rework or scrap.
- Evidence request: raw settings, calibration, environmental log, cure schedule, sample map, measured results, defect photographs, interventions, yield, and open deviations.
Ask the supplier to run the final materials under representative conditions and to state which results are formulation-specific. A test at one temperature and humidity should not be described as proof for an untested seasonal range.
FAQ
What temperature should I use for resin doming?
Use the supported range and cure schedule in the current TDS for the exact A and B products, then verify it on the final printed construction. Record component, substrate, ambient, and cure-zone temperatures separately. There is no reliable universal setpoint for all doming epoxies or polyurethanes.
Is polyurethane always more moisture-sensitive than epoxy?
Many two-component polyurethane systems contain an isocyanate component that requires strict protection from moisture, but the required control is formulation-specific. Epoxy should not be assumed immune to humidity or surface effects. Compare the current TDS and sample result for the exact products.
Does vacuum degassing remove moisture?
Do not treat vacuum degassing as a general moisture-removal guarantee. It can reduce entrained or dissolved gas when a validated procedure is used. Sealed storage, controlled transfer, dry substrates, limited exposure, and any product-specific humidity control remain separate requirements.
Can heating fix resin that remains tacky?
Not safely as a first response. Verify the A/B ratio, mixing, component identity and condition, contamination, resin age, elapsed time, and actual cure-zone temperature first. Apply heat only through the cure schedule approved for that exact resin and validated product.
What does resin cure time mean?
It must name a stage and method. Pot life, gel, tack-free, handling cure, packing readiness, final cure, and post-cure are different checkpoints. State the timer start, inspection method, sample condition, and pass criterion for the stage that matters to production.
Do I need a doming machine with heating?
Only when a defined material-conditioning function is supported by the resin documentation and sample results. A tank or hose heater does not replace a validated cure oven, and cure heating does not automatically solve cold material, moisture, ratio, mixing, or positioning problems.
Does CCD vision help with humidity or curing problems?
No. CCD vision can reduce product-positioning work when layouts shift or products are placed irregularly. It does not control resin temperature, A/B ratio, humidity, bubbles, or cure. Select the positioning method and the resin-control method as separate decisions.
Conclusion
Temperature, humidity, and cure time should be treated as measured process variables, not generic machine specifications. Start with the exact resin TDS, separate material conditioning from substrate preparation and cure heating, and define the required cure stage for every handling and quality decision.
Before purchasing environmental options or approving a production recipe, run a traceable sample test using the final resin, product construction, metering configuration, representative site conditions, and agreed inspection methods. This converts a supplier recommendation into a process window that operators can monitor, buyers can compare, and quality teams can verify.